


recent articles
- How to make a ceiling fan light brighter
- How to install a ceiling fan remote
- Everything you need to know about ceiling fan light kits
- AC Vs. DC Ceiling Fans: Which One Is Right For You?
- Choosing The Right Blade Material For Your Ceiling Fan: Factors To Consider
- Efficient Fan Usage: Tips For Using Ceiling Fans To Supplement Your HVAC System
- Energy-Efficient Cooling: Exploring The Advantages Of DC Motor Ceiling Fans
- Choosing The Right Ceiling Fan: A Comprehensive Buyer's Guide
- 5 Fan-Tastic Ways To Maximize Your Fan’s Efficiency
- Mastering the Art of Uninstalling a Ceiling Fan: A Step-by-Step Guide
- Enhancing Comfort: Mastering Wall Fan Sizing and Positioning
- Ceiling Fans Vs. Air Conditioners: Pros And Cons For Different Situations
- Bladeless Ceiling Fans
- Misting Fan Buying Guide
- What Is CFM in a Ceiling Fan?
- Which direction should my Ceiling Fan spin in Winter?
- The Matthews Fan Company Story
- What Size Ceiling Fan Do I Need
 May 14, 2024
How to install a ceiling fan remote
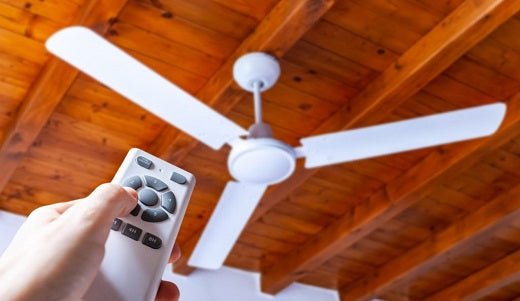
How to Install a Ceiling Fan Remote
Ceiling fans are indispensable for home comfort. But what if we told you there's a way to control your fan remotely? When you're cozying up in bed or are stretched out on the sofa, you can just press a button to create a perfectly matching atmosphere for your rest. Let's find out how to install a ceiling fan remote yourself.
Preparation and Safety Measures
Before you start installing a ceiling fan remote, remember that safety is above all. Verify your power is off to protect yourself against any potential electrifying encounters.
Then, it's time to gather tools for ceiling fan remote installation. They include:
- A stepladder. Choose a sturdy and stable one, for it will be your closest helper in reaching your lofty goals.
- Screwdriver. It will help you vanquish stubborn screws and dismantle barriers (also known as the fan’s canopy).
- Wire stripper. This tool will strip the wires down to their most connective essence and ensure your connections are clean, clear, and ready to communicate.
- The new remote kit. The remote and receiver will turn your fan into a responsive tool that reacts to your every command from afar.
- Electrical tape. It's often overlooked yet immensely powerful. This tool is used to ensure your connections are safe from unwanted contact.
- Digital multimeter. This device will confirm that the power is truly off and that the electrical currents flow as they should once everything is connected.
- Patience and courage. Not found in any store but cultivated within. They will help you solve challenges and inspire persistence until your quest is complete.
So, now you're prepared to install a ceiling fan remote with joy, so let's start the installation itself. The first step is to identify your ceiling fan type.
Identifying Your Ceiling Fan Type
Not all fans are born under the same star. That's why you should identify your ceiling fan type because it must sync with any remote you may introduce to it. Here's how to do it properly:
- First, look for a label or stamp that reveals the make and model. This will help you select the right remote and receiver pair.
- Then, try to find the original manual. This sacred scroll contains practical advice on compatible accessories, including remote controls.
- Sometimes, the fastest route to knowledge is a direct inquiry. Reach out to your fan’s manufacturer and inquire about compatible remote controls. This will save you from the trial of mismatched components.
- Ensure the remote kit you eye is destined to work with your ceiling fan. This means electrical compatibility — the communication between the remote and receiver should be clear and uninterrupted.
- Look for remotes that promise a simple set-up, ideally without needing to rewire your fan’s very essence.
- If your ceiling fan lights up your room or reverses direction with the seasons, your remote should too. Choose a control that fully commands your fan's features.
- Verify that integrating a new remote won’t void your fan’s protection against the forces of malfunction or despair.
- You can also find some reviews from someone who has already tried to install ceiling fan remote controls. Read their accounts, learn from their experience, and choose a remote control that has proven itself worthy in the homes of those who came before.
When you press that button for the first time after using these tips and installing a fan remote control, your fan will respond to your every command with a whisper of wind.
How to Install Ceiling Fan Remote Control
Installing a ceiling fan remote will turn your fan into a smart appliance that bends to your will with just a click. It’s a simple process, but you should still pay attention to every detail. Here's how you can do it, step by step, without the fluff:
- Remove the canopy. First, climb up your ladder and gently remove the canopy cover to expose the fan’s inner wiring.
- Wire the receiver. The receiver is the middleman between your fan and the remote. Connect the wires from the receiver to their matching partners on the fan. Usually, it’s as simple as matching the colors — black to black (hot), white to white (neutral). There’s also a wire meant to connect to the fan’s capacitor which controls the speed.
- Configure the dip switches. The dip switches on both the receiver and remote need to be set the same way. Getting them to match ensures they understand each other perfectly and allow for flawless control.
- Secure the receiver. Next, snugly fit the receiver inside the canopy. Do your best to set it comfortably without interfering with any moving parts of the fan. It’s a small component, but important for a remote’s operation.
- Restore the canopy. Finally, put the canopy back in place to cover up the internal wiring again and, of course, signify that the installation is complete.
Well, now you have a ceiling fan with remote controls. It's time to test and fine-tune it if necessary.
Testing and Fine-tuning
Once the canopy is securely reattached, marking the end of your hands-on installation work, the next important moment arrives — testing and fine-tuning a remote control.
Take the remote and press the power button. You should expect an immediate response from your fan, a silent nod to its newfound obedience.
However, it is a rare instance when your fan refuses to acknowledge your remote’s commands. In this case, here’s what you can do to troubleshoot:
- Revisit the dip switches. Ensure they're set identically on both the receiver inside the canopy and the remote itself. Even a single switch out of place can disrupt the operation.
- Check the wiring connections. Sometimes, a wire may not be as secure as it needs to be, leading to miscommunication or no communication at all. Safely climb back up and peek under the canopy. Make sure each wire is firmly connected to its correct partner, with no loose ends.
- Battery check. It may seem simple, but ensure the remote’s battery is fresh and correctly installed. A weak or improperly seated battery can be the culprit behind a non-responsive fan.
- Range and interference. Test the remote from different distances and angles. Sometimes, objects or walls can interfere with the signal.
- Consult the manual. If your fan continues to act up, refer back to the installation manual. There may be specific troubleshooting tips for your model or additional steps that were missed.
Once everything is perfectly set up, you’ll be able to control your environment with just a few buttons.
Universal Ceiling Fan Remotes
If you've got a ceiling fan that didn't come with its remote, or perhaps the original remote has long been lost to the depths of your couch cushions, universal ceiling fan remotes will help. Here's why they're worth considering:
- They are compatible with almost any ceiling fan possible — especially useful if your fan's brand-specific remote is unavailable or non-existent.
- You don’t need to be a pro with tools to install these remotes. Clear instructions and a simple setup process mean you can upgrade your fan easily.
- Just because they're universal doesn't mean they're basic. Expect functionality like speed adjustment, light dimming, and even timer settings.
- Upgrading to a universal remote is often more wallet-friendly than replacing an entire fan or searching for a rare, model-specific controller.
So, how do you choose a universal ceiling fan remote? Just use these tips:
- Most universal remotes live up to their name, but you should still double-check that yours will work with your fan model. A quick look at the product details or packaging will tell you what you need to know.
- Make sure you're comfortable with the installation process required for the remote you choose. It usually involves working with the fan’s wiring and fitting the receiver inside the canopy.
- Think about what features are important to you. If you want to dim your fan’s light or set it on a timer, ensure your new remote can do this.
- Choosing a remote from a company that offers 24/7 customer support and a good warranty can save you headaches later when you run into challenges during installation or use.
Installing a universal remote usually follows a few simple steps, just like it was described above opening the fan’s canopy to access the internals, connecting the receiver to the fan's wiring, matching the dip switch settings on both the remote and receiver, and then putting everything back together.

Still have questions?
 May 14, 2024

0


Shaya Meyer